
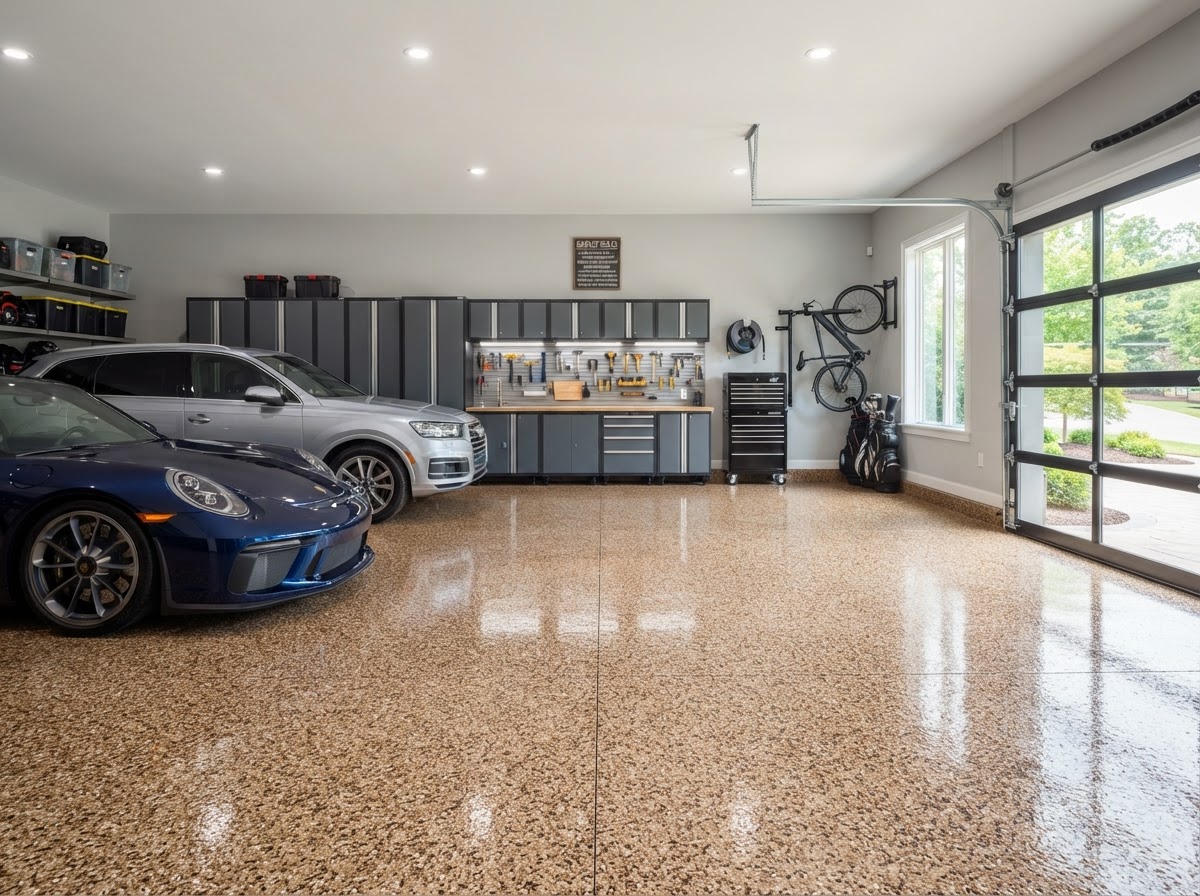
Flake Flooring Preparation, Process, and Care
The step-by-step installation process for a decorative flake floor — from slab prep through topcoat — plus the care routine that keeps it looking new.
Decorative Flake Flooring
2026-10-15
A decorative flake floor is only as durable as the preparation underneath it. The broadcast system — basecoat, flake, topcoat — bonds to a mechanically prepared slab, and every step in the process exists to make that bond last. Skipping the grind, skipping the crack repair, or rushing the cure is how a flake floor that should last years fails in months. Here is what the installation actually involves, step by step, and how to care for the floor once it's done.
KD Epoxy Floor installs decorative flake flooring across South Florida, from Palm Beach County to the Florida Keys. We follow the same process on every flake floor because the steps are what make the system perform. Understanding the process helps you prepare your space and plan around the cure window — and knowing the care routine helps the floor stay looking new for years.
Step 1: Assess and prepare the slab
Before any coating goes down, we assess the slab for moisture, check any existing coating for adhesion, and identify cracks, spalls, and joints that need repair. In South Florida's humidity, moisture testing is not optional — a slab with high moisture content or vapor pressure will compromise the coating bond. The assessment tells us what the floor needs before we quote it.
We then diamond-grind the slab to open the surface and remove contaminants — old sealer, oil, laitance, curing compounds — that would prevent the epoxy from bonding. Profiling creates the texture the basecoat locks into. Without this step, the flake system sits on a smooth or contaminated surface and lifts under traffic. See our diamond concrete preparation and polishing for the full prep scope.
Step 2: Repair cracks and spalls
Cracks are routed and cleaned to sound material, then filled with a material matched to the crack type — rigid epoxy paste for static cracks, flexible polyurea for moving joints. Spalls and holes are patched with compounds suited to the slab and the coating that follows. The repair is leveled and profiled so the flake system bridges a sound, smooth surface.
A coating over an unrepaired crack telegraphs the crack through the finish and eventually fails at it — which is why repair is part of preparation, not a separate decision. See our concrete crack and hole repair for the repair scope. The flake texture helps camouflage the repair, but the repair has to be sound before the flake goes over it.
Step 3: Apply the basecoat and broadcast the flake
The pigmented basecoat is applied to the prepared slab. While the basecoat is wet, vinyl chips are broadcast across the surface to the chosen density — fine, medium, or full. The timing matters: the chips have to go into the basecoat while it's still wet enough to hold them, which is why the broadcast is done immediately after the basecoat is applied.
For a full flake broadcast, chips are thrown to refusal — meaning the surface is saturated until the basecoat can hold no more. The excess is then scraped off after the basecoat sets, leaving a dense, multi-color surface. For fine or medium flake, the broadcast is lighter and the surface reads as a more uniform color with subtle to moderate texture.
Step 4: Scrape and topcoat
After the basecoat sets, loose flakes are scraped off the surface. The topcoat is then applied — a clear coat that seals the flake system and provides the wear surface. The topcoat is what takes the abrasion, the chemicals, and the UV from open doors or exterior exposure. It's selected for the use: standard for most interior spaces, heavy-duty for high-traffic areas, UV-stable for exterior or sun-exposed applications.
The topcoat can also carry an anti-slip aggregate for wet areas. For a pool deck or a patio that gets rain, the aggregate adds grip without sacrificing the flake look. See our slip-resistant flooring systems for the full traction scope. The topcoat is the wear surface — if it dulls over time in high-traffic areas, a recoat restores it without redoing the whole floor.
Installation steps at a glance
- Assess — moisture, existing coating, slab defects
- Grind — diamond-grind and profile for adhesion
- Repair — cracks, spalls, and joints
- Basecoat — pigmented basecoat applied
- Broadcast — flake scattered to chosen density
- Scrape and topcoat — loose flake removed, clear topcoat sealed
The cure window
After the topcoat goes down, the floor enters its cure window. Pedestrian traffic is usually fine within 24 hours, but full cure takes longer — typically three to seven days depending on the product and conditions. South Florida's heat and humidity affect cure time, and your estimator gives you the exact timing for your system.
The space needs to be cleared for the work and the cure. We tell you the timeline so you can plan around it — when it's safe to walk on the floor, when it can take light use, and when it's fully cured for full traffic. Rushing the cure is how a floor that should last years gets damaged in the first week.
Caring for your flake floor
The care routine is straightforward: sweep or damp-mop regularly, and use a soft-bristle brush for the textured areas that a mop alone might miss. The flake texture holds slightly more dirt than a smooth solid color, which is the trade-off for the forgiveness it provides — but a brush handles it easily. Mop with a neutral pH cleaner and avoid abrasive pads that can dull the topcoat.
Clean spills promptly — the topcoat resists oil and chemicals, but wiping up spills keeps the finish looking new. For a South Florida flake floor, the routine also includes keeping the surface clear of standing water, especially on exterior applications. Tracked rain or pool runoff should be wiped up, not just for the slip risk but because standing water on any coated surface can eventually affect the finish.
If the topcoat dulls in high-traffic areas over time, a recoat restores it without removing the whole system. The flake underneath is still sound — it's the topcoat that wears, and a recoat is how you refresh the floor without redoing it. We can set a maintenance schedule based on the traffic so the next recoat is planned, not reactive.
Daily care routine
- Sweep or damp-mop regularly
- Use a soft-bristle brush for textured areas
- Mop with a neutral pH cleaner
- Clean spills promptly
- Avoid abrasive pads and harsh chemicals
- Recoat the topcoat when wear appears
Frequently asked questions
How long does a flake floor installation take?
A typical residential space takes one to two days for the coating work, plus the cure window before full traffic. The exact timeline depends on the slab condition, the flake size and density, and the size of the space. We tell you the schedule after the assessment.
Is flake flooring harder to clean than solid color?
Slightly — the texture holds a bit more dirt than a smooth surface. But a soft-bristle brush handles the textured areas easily, and the trade-off is that flake hides the dirt it holds. A solid color is easier to mop but shows every mark. Most homeowners find flake's cleanability advantage — hiding wear — outweighs the slightly extra brushing.
How soon can I use my new flake floor?
Pedestrian traffic is usually fine within 24 hours, but full cure takes longer — typically three to seven days depending on the product and conditions. Your estimator gives you the exact timing for your system so you can plan around the cure window.
Will the flake fade in the sun?
We use UV-stable chips and topcoats for exterior or sun-exposed areas. For full-sun patios or pool decks, we confirm the right product for the exposure. A UV-stable system holds its color far longer than a non-exterior product, and a recoat on schedule restores the finish before fading becomes a problem.
How do I maintain a flake floor?
Sweep or damp-mop regularly, use a soft-bristle brush for textured areas, mop with a neutral pH cleaner, and clean spills promptly. Avoid abrasive pads that dull the topcoat. If the topcoat wears in high-traffic areas, a recoat restores it without redoing the whole floor.
Do you serve my area?
We serve South Florida from Palm Beach County to the Florida Keys. Share your project city or ZIP and we'll confirm availability before scheduling your estimate.
Ready for a flake floor? Request a custom estimate and we'll walk you through the process.
More about Decorative Flake Flooring
What Is Decorative Flake Flooring? Suitability and Common Questions
A clear guide to decorative flake epoxy flooring — what it is, where it works best, and the questions homeowners ask before choosing it.
Flake Flooring Options, Comparisons, and Cost Factors
How flake sizes, colors, and systems compare to solid color and metallic — and what drives the cost of a decorative flake floor.
Flake Flooring Mistakes, Misconceptions, and How to Avoid Them
The common mistakes that undermine decorative flake floors — from wrong flake size to poor prep — and how to prevent them before you install.